User Management Tutorial
Step-by-step guide to inviting and managing users in your LetLMS school
How to Manage Users in Your School
This tutorial will guide you through the complete process of inviting, managing, and organizing users in your LetLMS school. You'll learn how to set up proper user roles and manage course access effectively.

Inviting Users
Email Invitations
Invite users to your school by sending email invitations with specific role assignments.

Invitation Process:
- Enter the user's email address
- Select their role (Admin or Student)
- Send the invitation
- User receives an invitation email
- User accepts the invite and gains access
User Roles
Admin Role
- Full access to school management features
- Can create and manage courses
- Enroll students in non-published courses
- View analytics and user progress
- Manage school settings and configurations
Student Role
- Access to learner dashboard and enrolled courses
- Can enroll in published courses automatically
- Use AI chatbot for learning assistance
- View personal progress and analytics
Course Access Management
Published vs Non-Published Courses
Non-Published Courses (Draft)
- Only visible to manually enrolled students
- Admins must specifically enroll users
- Useful for beta testing or restricted content
- Perfect for instructor-only access during development
Published Courses
- Automatically available to all school users
- Students can self-enroll without admin intervention
- Visible in the school's course catalog
- Open access for all verified school members
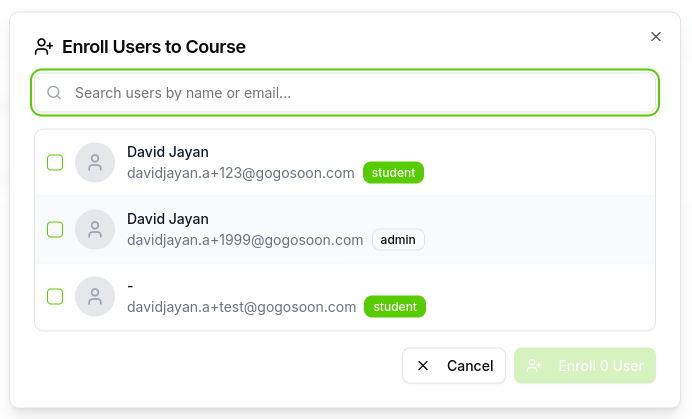
Manual Enrollment
Admins can manually enroll students in specific courses:
- Navigate to the course management section
- Select the non-published course
- Choose students to enroll
- Send enrollment notifications
Key Features
- Email-Based Invitations: Simple invitation process via email
- Role-Based Access: Automatic permission assignment based on user role
- Flexible Enrollment: Manual enrollment for draft courses, automatic for published
- Secure Access: Users only access content appropriate to their role and school
- Instant Activation: Users gain immediate access upon accepting invitations
What's Next?
After setting up your users:
- Create Your First Course: Follow our Course Creation Tutorial
- Add Engaging Content: Learn about Content Types
- Monitor User Activity: Track engagement and course completion
- Expand Your School: Invite more users as your program grows
Congratulations! You now have a well-organized school with properly managed users. Your educational community is ready to start creating and accessing engaging learning content.